Posts

Showing posts from August, 2013

embroidered mobile phone cover

Image
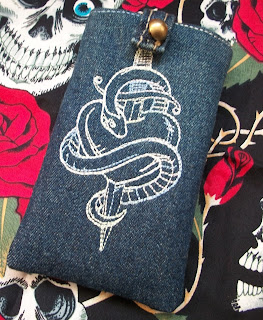
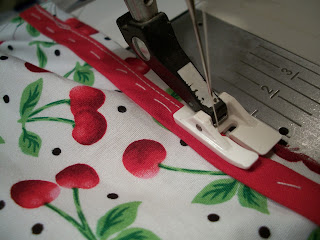
Hi, hope you are having a lovely weekend. At last I have made a cover for my mobile phone, I've been meaning to make one for so long but never got round to it. I 'upcycled' my son's denim shorts for this project. The front is embroidered with Sulky variegated thread. The embroidery is a thread tattoo by Urban Threads.  they have great embroideries and freebies too! This is a great way to use up scraps - I lined the cover with a piece of leftover gingham too! The tab is a belt loop from the shorts. Thanks for visiting Jolanda x

spotty dotty crossover top

Image
Hi, A few weeks ago I bought some lovely red polka dot jersey from my favourite fabric shop in Norwich. It is just too nice to make a plain t-shirt top, so I flicked through all my old Knipmode magazines and found the perfect pattern in the June 2005 issue. The top is pictured in the top right hand corner. So I got stitching and came up with this It was very easy to sew indeed! Everything fitted together perfectly ... I love it when that happens (it doesn't seem to happen that often!) The only downside is that it is a little on the short side - which is unusual as usually I have to make things a little shorter!  I am glad I am not 1.80m tall. which is the size the pattern goes up to. It looks ok with this high waisted skirt though but the skirt is a lot too tight on me, so I will have to find a way of enlarging it somehow. Thanks for visiting Jolanda x

cheeky panties by emily kate

Image
Hi there, I thought I would share with you my new underwear! I have never made underwear before but thought it would be nice to have some underwear to match my clothes. I downloaded a FREE pattern from Burda Style website. The pattern is super easy to make and super fast - just over an hour (it was my first attempt so I took it slow) I used my overlocker for the seams and for attaching the picot elastic. Then turned the elastic to the inside and zig zagged the edge from the front. The leg openings look a little stretched but when worn this doesn't show at all. I have worn them now and they are very comfortable, I will certainly be making some more! Thanks for visiting Jolanda xx

The finished cherry dress

Image
At last! the finished dress. This did take me quite a while to make because of the flat piping!   I wasn't sure of the best way of attaching it, especially around the neck, so lots of sample were made first!! This is a close up of the binding (doesn't look that straight in the photo but believe me it is!) The gorgeous material was bought at Anglian Fabrics on Magdelen Street in Norwich, and the belt was a bargain find in Debenhams. The pattern for this dress is in the Dutch Knipmode magazine from a few years ago. Thanks for visiting me Jolanda x

sewing a straight line to get my flat piping perfect!

Image
Hi Everyone!  This is the third time I have made this dress style and needed to make it a little bit different. I like the look of flat piping opposed to corded on the edges of a dress but this posed a little problem for me as I couldn't butt the presser foot up against the cord to sew a straight line.  First, I tried a normal foot but couldn't do it very straight and then used my blind hem foot (pictured below)   It butts up against the edge of the piping to give a perfectly straight stitching line. Next I pinned the facing over this and turned the whole piece over. Sorry for the bad photo, but I think you can just see the stitching line to the right of the foot; I used this as a guide and stitched slightly to the left to join the front, piping and facing together. So when I turned everything to the right side my piping was perfectly level all round. (my two rows of stitching on the armhole before turning) Thanks for looking pictures of the fin